| 18 |  Aware of the vents for voice transmission, camera lens etc. Remember to remove those that will cause inconvenience. Aware of the vents for voice transmission, camera lens etc. Remember to remove those that will cause inconvenience. |
|
| 19 | 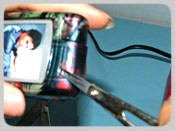 Scissors may be a useful tool here. Scissors may be a useful tool here.
Anyway, make sure the trimming is neat and tidy so that customer will not annoy. |
|
| 20 | 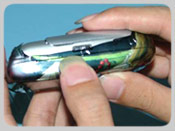 Next is to trim the borders, always look for the grooves so lower risk of scratching the phone. Before cutting, roughly rub again to ensure no pleats and firm attachment. Next is to trim the borders, always look for the grooves so lower risk of scratching the phone. Before cutting, roughly rub again to ensure no pleats and firm attachment. |
|
| 21 | 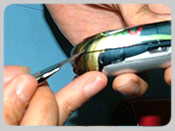 While the blade is sharp, the cutting should be smooth and easy. Move slowly when reaching curved regions and control the strength. Be careful not to damage the phone. While the blade is sharp, the cutting should be smooth and easy. Move slowly when reaching curved regions and control the strength. Be careful not to damage the phone. |
|
| 22 | 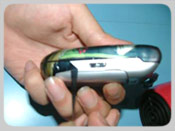 Remove the excessive sticker gently and beware of any uncut region. Pulling too fast may cause uncut part becomes awful and require more effort to trim further. Remove the excessive sticker gently and beware of any uncut region. Pulling too fast may cause uncut part becomes awful and require more effort to trim further. |
|
| 23 | 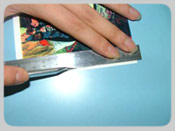 As soon as the border is trimmed, cut a thin slice of transparent sticker out. These thin slices of transparent sticker are placed on the border of the wrapped sticker to grant stability so severe shrinkage can be prevented. As soon as the border is trimmed, cut a thin slice of transparent sticker out. These thin slices of transparent sticker are placed on the border of the wrapped sticker to grant stability so severe shrinkage can be prevented.
If the sticker is not long enough, just separate a few times and make sure all the borders are covered. Anyway, it should be at least enough length to cover the borders of 2 corners (top or bottom of the phone) in once. This is very important and should not be skipped. It should be done immediately after trimming the border. |
|
| 24 |
The sticker can be pulled to elongate especially for corners so that it is tight since corner is common shrinking site. Therefore, the sticker should at least long enough to cover 2 corners so it can hold the wrapped sticker efficiently. Do not pull at both end of the sticker as it will make it spring back. |
|
| 25 |
Switch to the back and repeat the steps. Firstly, remove the remaining sticker. Remember to reserve some transparent sticker for further use. |
|
| 26 |
Start pressing and rubbing to remove air bubble and tighten the sticker attachment. |
|
| 27 | 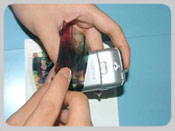 The attached sticker can always be removed if bubble spotted and continue until no air bubble. The attached sticker can always be removed if bubble spotted and continue until no air bubble. |
|
| 28 | 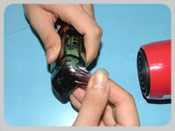 Apply HOT air to soften the sticker when wrapping side regions. Apply HOT air to soften the sticker when wrapping side regions.
Stretch, press and rub to ensure no pleats found on targeted area. |
|
| 29 |
Switch to COLD air after that and continue pressing for at least 5 minutes. |
|